Area
Table Areas
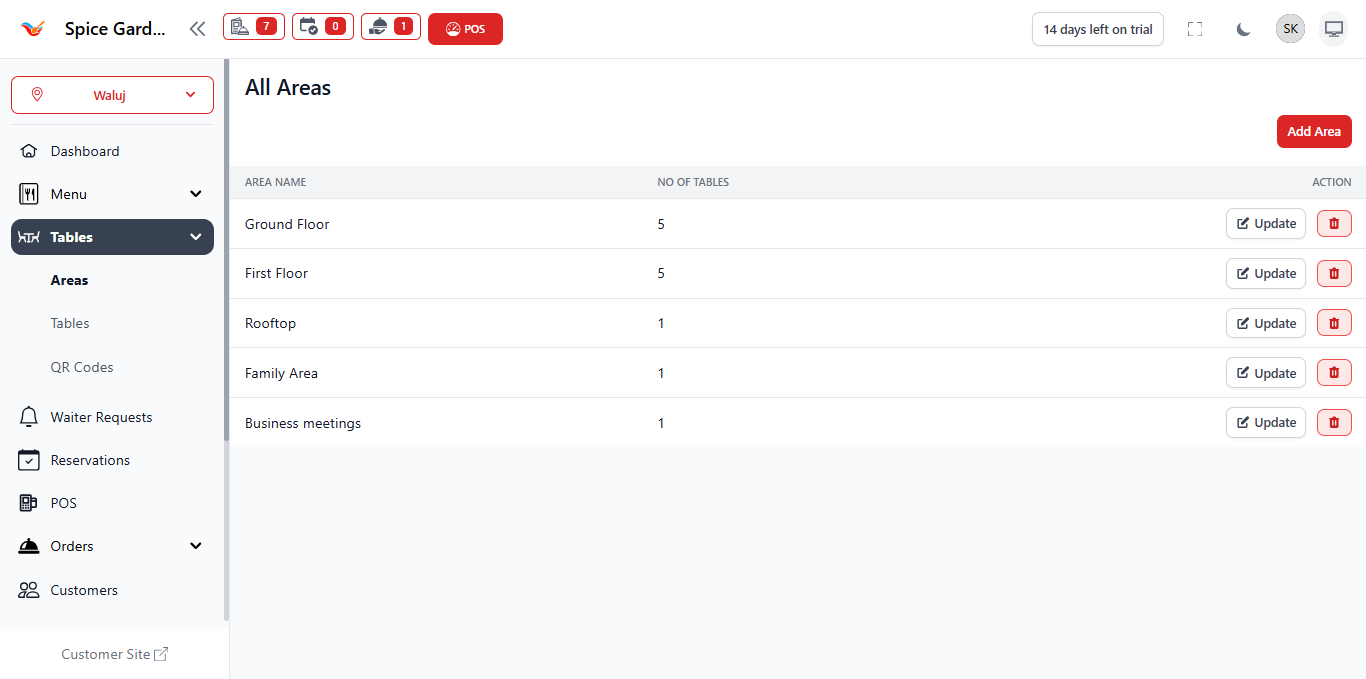
Table Areas allow you to organize your restaurant seating layout into structured sections. Each table must belong to an area to ensure proper management of dine-in orders, reservations, and seating control.
1. What Are Areas?
An Area represents a physical section of your restaurant. It helps categorize tables based on location or function.
Examples:
- Ground Floor
- First Floor
- Rooftop
- Family Area
- Business Meeting Section
Areas improve operational efficiency by grouping tables logically.
2. Why Areas Are Important
- Organize large restaurants efficiently.
- Help staff quickly locate tables.
- Improve reservation assignment accuracy.
- Enable structured table filtering.
Larger restaurants should always divide seating into multiple areas.
3. Creating a New Area
- Go to Tables from the sidebar.
- Select Areas.
- Click Add Area.
- Enter Area Name.
- Click Save.
Area names should match your actual restaurant layout.
4. Understanding the Areas Table
The table displays:
- Area Name – Name of the restaurant section.
- No. of Tables – Total tables under that area.
- Actions – Update or Delete options.
The table count helps track seating distribution across areas.
5. Updating an Area
- Click Update.
- Modify the area name.
- Save changes.
Updating an area does not affect existing table assignments.
6. Deleting an Area
- Click the Delete icon.
- Confirm deletion.
An area cannot be deleted if tables are assigned to it.
Remove or reassign tables before deletion.
7. Recommended Setup Workflow
- Create Areas first.
- Add Tables inside each area.
- Assign waiters if applicable.
- Start managing dine-in orders via POS.
Structured area setup improves seating control and service speed.