How to Add Table
How to Add a Table
Adding tables allows you to digitally manage dine-in seating inside your restaurant. Each table represents a physical seating location used for order tracking, billing, and waiter assignment.
Step 1: Open Table Management
Navigate to Tables
- Go to the left sidebar.
- Click Tables.
- Select Tables from submenu.
- Click the Add Table button.
Step 2: Fill Table Details
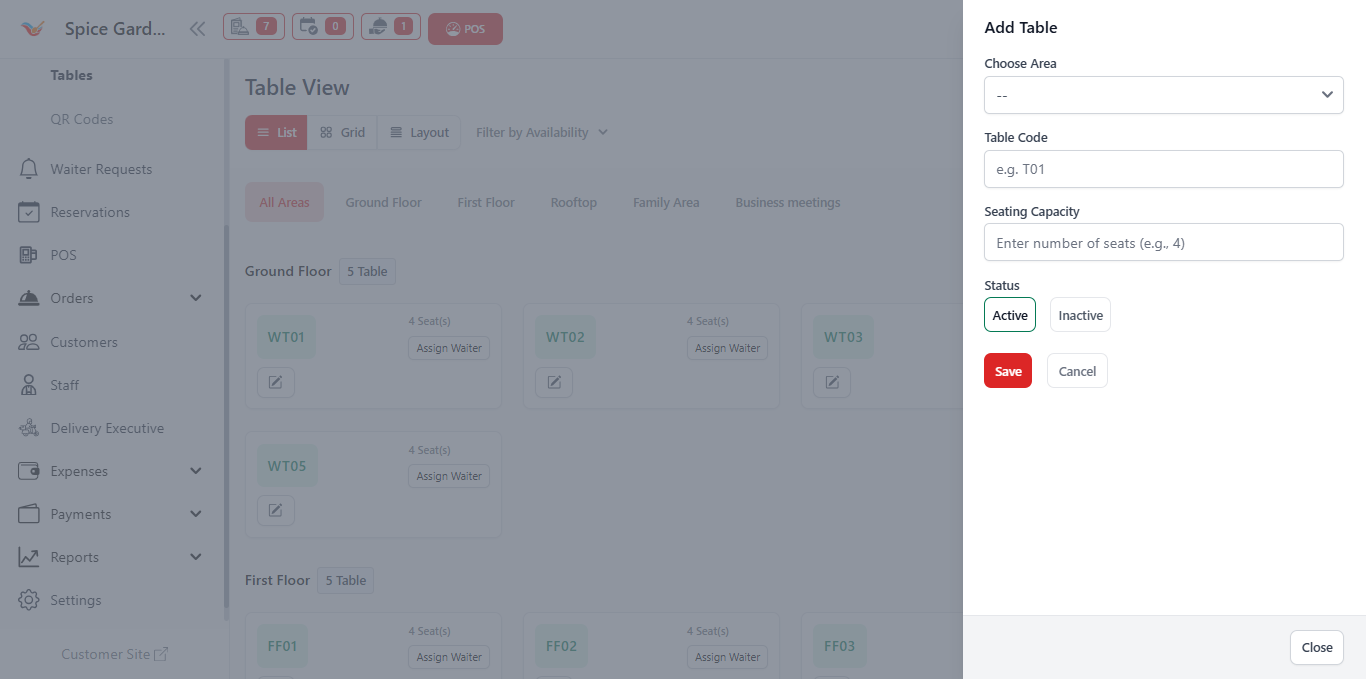
After clicking Add Table, a side panel will open.
Choose Area
Select the restaurant area where the table belongs.
Example: Ground Floor, Rooftop, Family Area.
Table Code
Enter a unique table identifier.
Example:
- WT01
- FF02
- T05
Seating Capacity
Enter how many customers can sit at this table.
Example: 2, 4, 6, or 8 seats.
Status
Choose table availability:
- Active — Table available for orders.
- Inactive — Table hidden from POS.
Step 3: Save the Table
- Verify all information.
- Click Save.
- The table will instantly appear in Table View.
The table becomes available immediately for dine-in orders after saving.
Best Practices
- Use clear naming like GF01 or RT02.
- Match table codes with physical labels.
- Group tables logically by area.
- Keep inactive tables disabled instead of deleting them.
Proper table setup improves POS speed and reduces staff confusion during rush hours.
Troubleshooting
If a table does not appear in POS:
- Check if status is set to Active.
- Ensure the table belongs to an active area.
- Refresh the POS screen.