Menu Items
Menu Items
Menu Items represent the actual food and beverage products offered by your restaurant. Each item can include pricing, category assignment, availability status, and optional customization through modifiers.
1. What Are Menu Items?
A Menu Item is a sellable product listed in your restaurant system. It appears in the POS interface and can be selected by staff or customers.
Each item is connected to:
- Category – Organizes the item.
- Price – Base selling price.
- Modifiers – Customization options.
- Status – Active or Inactive.
2. Accessing Menu Items
- Login to the Dashboard.
- Go to Menu from the sidebar.
- Select Menu Items.
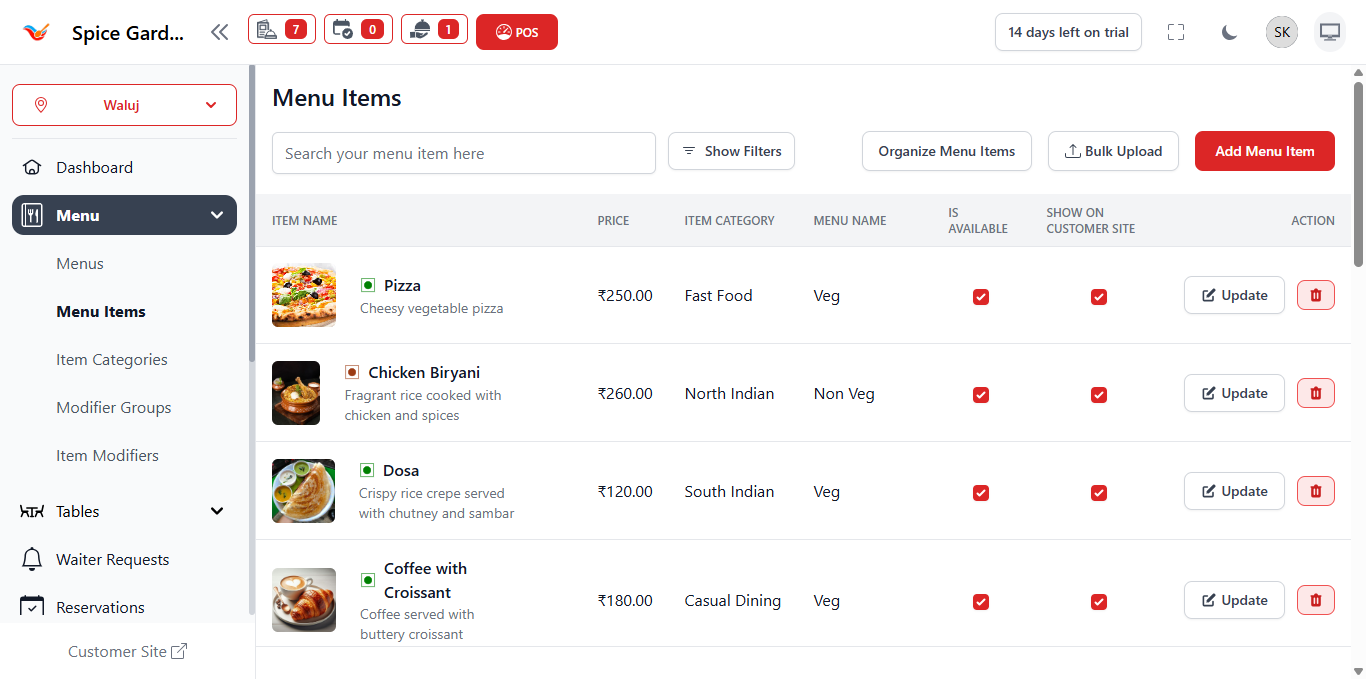
The Menu Items page displays all created items in a structured table format.
3. Understanding the Menu Items Table
The table includes:
- Item Name – Name of the dish.
- Category – Assigned category.
- Price – Base selling price.
- Status – Active or inactive visibility.
- Actions – Update or Delete options.
4. Creating a New Menu Item
- Click Add Item.
- Select the appropriate Category.
- Enter the Item Name.
- Set the Base Price.
- Upload an item image (optional but recommended).
- Add description if required.
- Save the item.
Example Items
- Paneer Butter Masala
- Chicken Biryani
- Veg Burger
- Cold Coffee
5. Updating a Menu Item
- Click the Update button.
- Edit required fields.
- Save changes.
6. Deleting a Menu Item
- Click the Delete icon.
- Confirm deletion.
7. Item Availability Management
Items can be temporarily disabled without deleting them.
- Active – Item appears in POS and menu.
- Inactive – Item is hidden.
8. Assigning Modifiers to Menu Items
After creating modifier groups and item modifiers, they can be linked to menu items for customization.
- Select the item.
- Assign relevant modifier groups.
- Save changes.
9. Best Practices
- Use clear and standardized naming conventions.
- Add high-quality images for better presentation.
- Review pricing regularly.
- Avoid duplicate items.
- Organize items properly using categories.